How To Install A Hot Water Tank In A Camper
Pro. Master Camper Van Conversion - - Plumbing. Search The Renewable Energy site for Do- It- Yourselfers. Important Update. The material on these pages describing our camper van conversion has been moved to our new new site dedicated to efficient RVs and camper vans. The new site covers all the material here and adds a lot of new material on other camper van conversions, camper van design and build, resources for people converting vans, other efficient camping vehicles, new ideas in efficient RVs and camper van travel hints.
The new site is here.. I'm leaving these pages here as you may have bookmarked them and the Comments section has some good suggestions, but I suggest that you go to the new site - - I won't be updating this material anymore. Thanks to all the people who read these pages and especially to the people who left comments and suggestions! Feedback on the new site is very much appreciated. Gary The van has a very simple plumbing system. The fresh water supply side consists of the 1.
PEX line to the kitchen sink - - no hot water heater. The grey water drain system consists of a drain from the kitchen sink to a grey water tank under the van, and an outlet to dump grey water overboard.
There is no toilet (blackwater) tank or drain as we plan to use a composting toilet, and there is no shower, although we might add an outside shower panel later at the back of the van depending on how things go. Fresh Water System. The fresh water tank is from Plastic Mart.
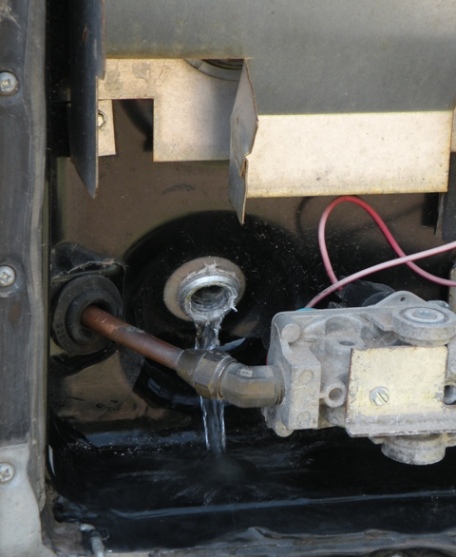
Your RV Water Heater: 10 Important. There are three main ways to heat the water in a hot water tank. To avoid hard-water corrosion inside the tank, install. Campervan Heating and Hot Water. Itunes 11 Manually Manage Music Without Erasing Iphone 5. If you plan to have a shower in your camper and hot water. These systems use diesel direct from a vehicles tank which. There are several reasons to drain an RV water heater. Run the hot water inside the RV until it. When the tank is empty, replace the plug or install a new.
They offer quite a few sizes, and we were able to find one that fit our space well. They will install fittings in the tank where you want them and to the size you want.

- RV Hot Water Systems. The RV hot water system begins at the water heater, obviously, and then becomes, essentially, a. To drain the hot water tank.
- Plan your camper water system and waste in the early stages so you know. A fixed internal water tank is convenient and common.
- A new hot water tank can have savings of $700 in energy cost over its life span. OKC: (405) 721-3740.
- Atwood 91641 Water Heater Replacement Inner Tank Kit Camper Trailer RV. Relief valve is now 3/4" on any water heater manufactured after February 2006.
- How to Install a Camper Water Heater Bypass.
- A splutter, trickle and finally a whooshand (with only one small-ish flood) we had two sinks full of water! To install the plumbing system we used: A 30 litre cold.
- RV hot water heater maintenance is pretty. If the anode has been in there a while and the camper used a.
Ours has a 1 1/4 NPT thread fitting on the top for filling, and a half inch NPT fitting down low for drawing water out of the tank. The basic tank starts at what seems like a bargain $6. Update: Feb 2. 01.
The tank appears to be well made and has relatively thick walls. The 1. 7 gallon capacity is a bit on the small side as far as commercial RV's go, but the fact that we will have a composting toilet and not be using any of the water for toilet flushing makes the effective size of the tank quite a bit larger. We also don't have a shower. It also seems like potable water is pretty readily available in most areas. Update: Feb 2. 01. Based on the first week long trip, the 1.
The tank as it comes from Plastic Mart. Trial fitting the tank in place. It goes into the forward end of the passenger side bed. It fits well in that spot, and with the tank in this position, it can be filled by just opening the sliding door and running fill hose into the 1 1/4 inch filler fitting on the top - - no need for another hole in the van for an outside fill port.
The tank in position. The fill port is the large fitting on top. The water outlet for the tank is the small (1/2 inch NPT) white plastic fitting near the bottom. The red PEX line is going off to the galley on the other side of van (see floor section for routing). Mounting the tank. The tank is secured in place by the two blocks of wood (1 1/2 by 2 inches) you can see at the front of the tank.
These are screwed to the bed box which is bolted through the floor. The aluminum angle iron across the front of the tank (which is screwed to the bed box) keeps the tank from moving upward in those pesky negative g situations. There are spacers on the right and left ends of tank that keep the tank from moving side to side. Hooking up the pump: The pump and plumbing around the pump.
The pump is a 1. 2 volt DC Shurflo Revolution 4. This is a 3 gpm pump that automatically turns off and on with demand.
The reviews I read indicate that the new model is a big improvement - - will see. I also got the flexible hose kit and the strainer for the inlet that Shurflo recommended. The strainer keeps junk out of the pump, and the flexible hoses keep the pump from transmitting vibration (noise) to the van. The hoses just screw on to half inch NPT threads finger tight - - very quick to install. The pump mounting pad is rubbery to absorb vibration and noise.
The hose coming into the right (strainer side) of the pump is the from the tank outlet fitting, and the hose from the left of the pump is the outlet and goes to the one and only water use point in the van - - the sink on the other side. The MDO plywood pad that the pump is screwed down to is just silicone caulked to the floor.
I used a few zip ties to keep the flexible hoses from wandering too far. About $1. 00 for the pump, strainer and hoses.
Grey Water Tank. The grey water tank is an experiment that may or may not work out. I made the tank from MDO plywood that I had left over from the beds. Its basically a glued and screwed box made from the MDO. MDO is Medium Density Overlay plywood - - its a premium plywood with resin impregnated face sheets on each side. One of its industrial uses is to make tanks, so maybe this will be OK. Part of the reason I decided to go this way was just curiosity on how well it would hold up, but the other part is that is hard to find a plastic tank that fits the underside of the Pro.
Master and gives a descent volume without sticking down too far. I think that some of the commercial RV's remove the spare tire to make room for the tank, but we go on long gravel roads, and I don't want to be without a good spare. The finished tank is 1. I would like), and fits below the Pro. Master leaving 1. PM gas tank extends a bit lower than than the grey water tank.
The drain from the galley sink comes in high on one side of the tank, and the tank drain leaves low on the opposite side of the tank. The drain line is 1. PVC and has a ball valve to allow draining.
Left picture shows the finished tank mounted under the Pro. Master with straps. The right picture shows the tank in the shop just before the cover was put on - - inlet on left and outlet on right. Construction of Grey Water Tank: The tank got two coats of Behr latex house paint inside and out. I don't think that the MDO requires much protection, but it does help to seal the unprotected edges.
In the end, the tank cost essentially nothing to build as all the materials were leftoovers. Installing the Grey Water Tank: These pictures show placing and securing the tank. The straps are galvanized steel about 0. Home Depot . One negative for the MDO tank is that it weighs more than the poly tank - - The 1. MDO tank about 2. On the plus side, it probably is a bit more resistant to freezing and to rocks thrown at it by the tires.
Grey Water Plumbing. Sink to tank: The only water coming into the grey water tank is from the galley sink. I used regular household plumbing supplies from Home Depot to make the connections. The sink is a Houzer bar sink that they also sell for RV use. Also bought the Pfister G1. Amazon offered along with the sink.
Found out after the fact that Home Depot had a very similar bar sink, faucet and strainer combination availabe locally. Picture shows the standard household sink plumbing down through the van floor. The only change I made was to go down to 1 1/4 PVC pipe at the floor level to make the pipe a bit easier to run under the van floor.
The sink is just temporarily set in place here to work out the plumbing. The galley cabinet will have a fridge in the big hole to the right, and drawers and cabinet doors for the rest - - waiting on materials to finish this up.
One thing I'd offer as a caution is make sure you have a good route for the drain pipe from the sink to the tank under the van. Its easy to locate the galley and sink, and then find that you can't find a good route for the drain pipe. For example, in the picture above, I would like to have pushed the drain pipe back close to the van wall, but there was just no way to do this give the way the van frame and the exhaust pipe ran. The picture above shows the routing of the grey water line from the sink to the grey water tank under the van. The elbow in the foreground is coming down from the sink, and the 1 1/4 PVC line goes directly over to the top of the grey water tank.